


Building a wooden shed base is a relatively straightforward job but also one that’s essential to get right. A sturdy, level base will provide a solid foundation for your shed and give it the stability it needs to stand strong against the elements for years to come, so the effort you put in will be rewarded.
This guide walks you through every step of the process, from assessing the location to building and protecting your base. We also highlight some common mistakes you should avoid.
Building a wooden shed base, at a glance:
- Choose your site
- Clear and level the ground
- Calculate your timber requirements
- Construct your frame
- Lay out and mark up timbers
- Drill pilot holes to prevent wood splitting
- Screw the frame together and check it’s square
- Treat ends of timber with preservative to prevent rot
- Add a layer of gravel to improve drainage
- Lay a damp-proof membrane over the gravel
- Secure the frame with galvanised metal spikes
- Cut away excess damp-proof membrane
- Install your shed on its base!
You will need:
- Pressure-treated, rot-resistant timber
- Wood preserver for treating cuts
- Gravel for drainage
- Four galvanised metal ground spikes
- Four L-shaped brackets
- Damp-proof membrane or plastic spacers
- Screws, drill/ power driver, tape measure, spirit level and lump hammer
Is a wooden base suitable for your shed?
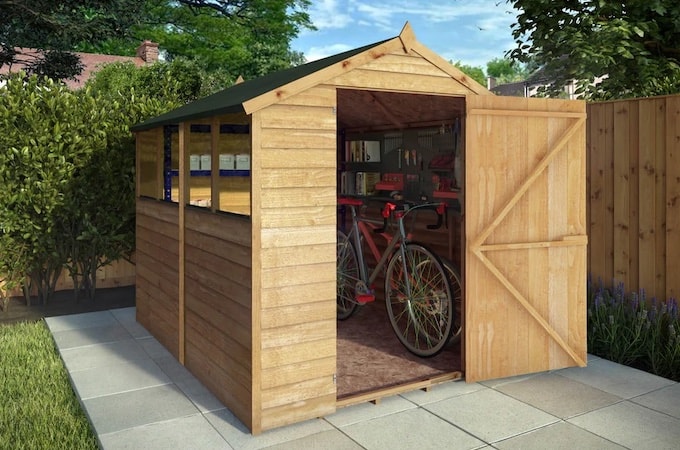
A wooden shed base is a cost-effective option that works well for most sheds up to around 10 x 8 feet. Made from a simple frame reinforced with crossbeams, it provides a stable platform while also raising the shed off the ground to help protect it from damp.
However, if your shed is larger than 10 x 8 feet or you are planning to keep heavy equipment inside, you should consider paving slabs or a concrete base as these are stronger and more durable, and probably better suited to your needs.
How to prepare the site for your shed base
- Choose your site
- Clear and level the ground
- Calculate your timber requirements
- Two 8ft timbers (to cap the ends)
- Four 6ft timbers (spaced at 2ft intervals for crossbeams)
- Construct the frame
- Lay out your timbers
- Drill pilot holes
- Screw the frame together
- Protect the base
- Add your gravel layer
- Lay a damp-proof membrane over the gravel
- Secure the frame
- Cut away excess damp-proof membrane
- Using untreated timber: Always use pressure-treated timber, and treat all cut ends with wood preserver
- Skipping ground preparation: Failing to clear and level the ground can result in an unstable base
- Ignoring drainage: Without proper drainage, water can collect around the base and cause damage over time
- Not aligning the frame correctly: A misaligned base can lead to an unstable shed structure
- Installing your shed on the base
First, you need to choose the right location. Pick a spot that gives you good access, as well as space for installation and future maintenance. Leave enough room around the shed for painting or treating the wood, and consider any overhangs from the roof. Avoid placing the base too close to walls, fences or overhanging foliage, as these could cause damage or restrict airflow.
Check how water drains in your garden, as placing the base in an area prone to pooling could lead to water damage.
Remove all vegetation from your chosen spot, including grass, weeds and roots. This is important to prevent plant growth from interfering with the base and making the timber frame unstable. A rake and a shovel is ideal for this task.
Use a spirit level to check that the ground is flat. If your garden is sloped, address this by adding or removing soil as needed. For larger slopes, drive wooden stakes into the ground and use a string line to create a level reference point. Fill uneven areas with compacted soil or gravel, and for extra drainage, consider a layer of gravel for your base to sit on. Pea gravel or ¾” gravel, also known as #57 gravel, is suitable for this.
How to build your wooden shed base
For an 8 x 6-foot shed, you’ll need:
A handy hint here is that you can buy pre-cut timber or opt for a kit that includes all the components you’ll need, including spikes, brackets and screws.
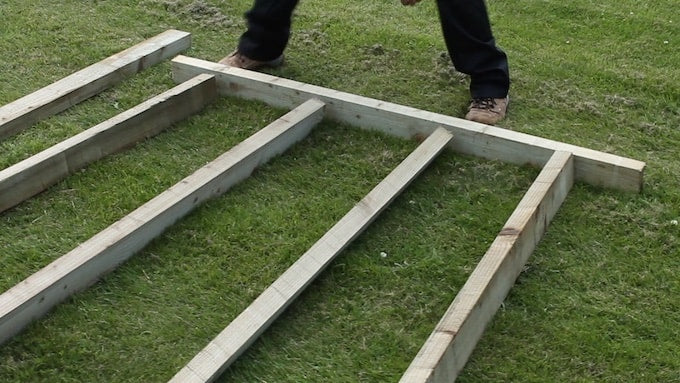
Lay out the timbers on a flat surface to form a rectangular frame. Bear in mind that pressure-treated structural timber is a must, otherwise the wood will be in danger of rotting.
Arrange the shorter timbers as crossbeams along the longer ones, spaced evenly to create a grid.
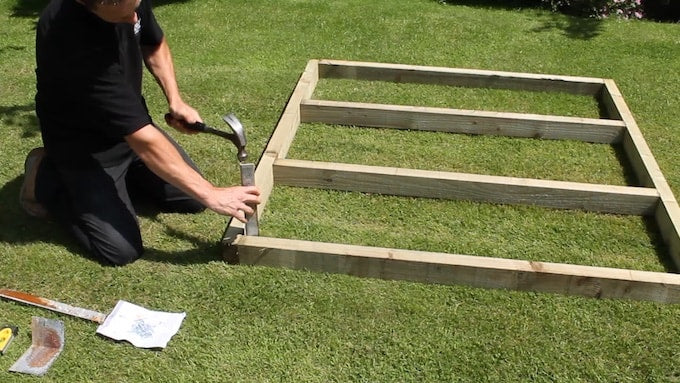
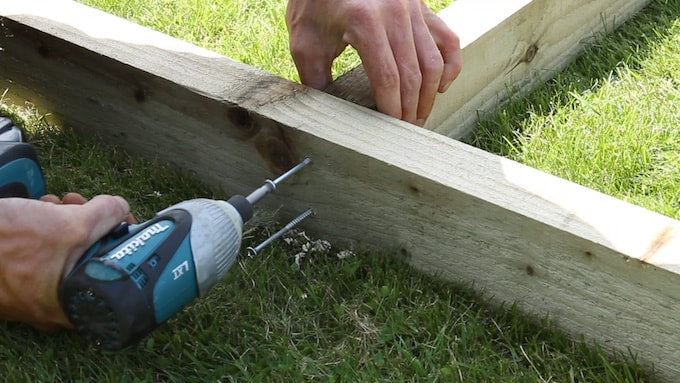
Measure and mark both longer timbers with a pencil where the crossbeams will attach, then drill two pilot holes at each mark to prevent the wood from splitting.
Once everything is marked and drilled, screw the frame together. Check the diagonals of the frame by measuring corner to corner – if they’re not equal, gently tap the frame into alignment with a lump hammer.
Treat all cut ends of the timber with wood preserver to protect them against rot. Then, lay a damp-proof membrane or plastic spacers underneath the frame to form a barrier against any moisture from the ground.
If you’re putting down a gravel layer, do this now. It’s not an essential step, but doing this will give you better drainage around your garden building
The more damp protection you can offer your garden building, the better. Prevent water ingress from below with a damp-proof membrane
Once in place, put a galvanised metal spike at each corner of the frame, flush against the inside edge. Next, hammer the spikes into the ground until their tops are level with the timber, and then screw them securely to the frame.
In each corner, attach an L-shaped plate to the inside of the longer timbers, close to the spike. Hammer the plates until they are flush with the ground, then screw them to the frame. These plates will help stabilise the base and keep it level.
Use a spirit level to make sure the frame is even on both axes. If you need to make adjustments, hammer the spikes further into the ground until the frame is completely level.
Keeping things tidy isn't just for aesthetic purposes – making sure loose ends are off the ground and there's nowhere for bugs & rodents to hide ensures the area around your shed stays that bit cleaner, too!
Drainage tips for wooden shed bases
Good drainage is essential if you want to keep both your wooden base and shed in good condition.
With that in mind, a layer of gravel underneath the frame is a simple method that improves water flow, helping rainwater to drain away from the base instead of pooling, thus reducing the risk of moisture damage.
Putting a geotextile membrane underneath the gravel will also block weeds while still allowing water to pass through.
You can help drainage even further by slightly sloping the ground around the base.
Common mistakes to avoid
If you’ve followed all these steps correctly, your wooden base is now secure, level and ready for the shed. Most sheds come with floor bearers attached to their underside. These are smaller timber supports – usually 3 x 2 inches – that run perpendicular to the wooden frame to improve airflow and further reduce the risk of damp.
If your shed doesn’t come with floor bearers, it’s worth adding them yourself. Space them 16 to 24 inches apart and attach them to the base before you start assembling the shed.
All in all, a wooden frame is a reasonably simple solution if you need a solid shed base, and a relatively quick one too – with a bit of help with the heavy lifting and decent DIY skills, you could get the job done in an afternoon. And with proper installation and maintenance, your shed will remain sturdy for years to come.
Check out the Waltons blog for more handy how-to guides for garden buildings –construction, conversion, maintenance and more.
