


Damp-proofing your garden shed is essential for two very good reasons: it protects the structure from moisture damage and also keeps your tools and equipment rust-free and ready to use.
Damp-proofing a shed isn’t a ‘one and done’ job. Keeping moisture at bay is a process that involves waterproofing, routine maintenance, proper insulation and ventilation. This guide takes you through everything you need to know, from spotting the early signs of damp to practical steps for keeping your garden shed dry and damage-free.
Shed damp-proofing tips, at a glance:
- Identify the type of damp that needs treating.
- Protect your shed against rising damp (moisture at the base) by creating a barrier between your shed and the ground.
- Tackle penetrating damp (leaks during rain) by repairing any issues with the roof, windows, door and guttering. Apply wood preserver annually.
- Reduce condensation damp (water droplets inside) by ventilating, insulating and heating your shed in the colder months.
- Protect shed contents from damp by storing in sealed containers and using silica gel sachets to absorb moisture.
- Keep damp at bay with regular maintenance inspections and timely repairs.
1. Identify the type of damp in your shed
Damp problems in sheds are common, but spotting the nature of the issue and its source as early as possible makes all the difference. Here’s what to look for:
- Rising damp: Look for damp patches or signs of water damage at the base of your shed.
- Penetrating damp: Check for leaks during rain, especially on walls or around windows and doors.
- Condensation damp: Noticeable water droplets on the inside of windows, walls or stored equipment.
Once you have identified the type of damp you’re dealing with, it’s time to take the right steps to tackle it effectively.
2. Protect your shed against rising damp
Rising damp occurs when moisture from the ground is soaked up into your shed. The best way to tackle this is by protecting the base and floor.
Shed base

Ideally, the job starts when you’re building your shed. Make sure the ground around your shed area is clear of vegetation to allow for proper drainage. Slightly sloping the ground away from the base helps prevent water pooling.
The most effective protection is to lay a heavy-duty polythene sheet or professional-grade damp-proof membrane beneath the base to block moisture and add gravel on top. If your shed is already in place, consider retrofitting a membrane by carefully lifting the floorboards and installing it underneath.
Shed floor
Raising your shed floor on treated timber battens is a simple but effective way to protect against rising damp. By creating a gap between the shed and the ground, it improves airflow, helps to keep the underside dry and reduces the risk of moisture seeping into the floor.
3. Protect your shed against penetrating damp
Penetrating damp is often caused by rainwater entering through weak points in your shed like the roof, walls or doors and windows. Regular maintenance and waterproofing are essential to keep it at bay.
Roof felt

Your roof is the first line of defence against rain, so inspect it regularly for damage. Felt roofing tends to wear out over time, especially along the ridge and eaves. Small tears can be patched with gutter sealant, while larger issues might mean you have to replace the felt entirely. This process requires you to:
- Remove the shed’s finials and fascia boards
- Untack and remove the damaged felt
- Measure the roof and cut the new felt to size
- Tack down the new felt
- Re-affix the fascia boards and finials
If you need to replace the felt, consider upgrading to the most durable EPDM rubber sheeting. You can find more detailed advice in our article on how to repair shed roof felt.
Timber walls
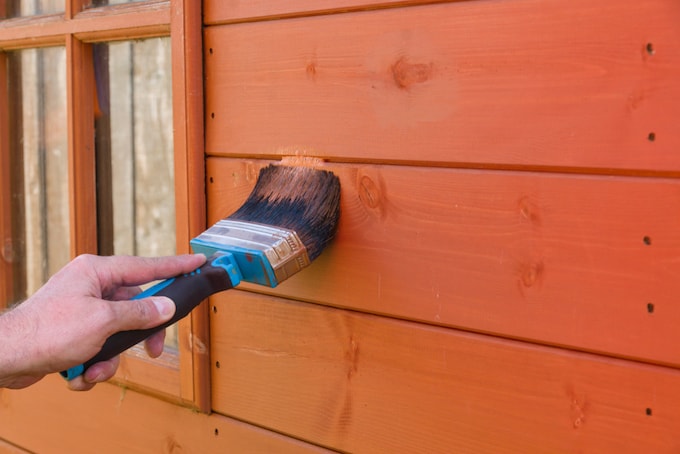
Waterproofing the walls is just as important. Regularly treating the wood is the best way to protect your shed from damp and mould, so apply a fresh coat of wood preserver to your shed every year.
If you want to add some personality to your shed, use an outdoor wood paint with a built-in preservative. This not only provides protection but also gives you the chance to put your own stamp on your shed.
Eaves and guttering

Overhanging eaves are a simple way to direct rainwater away from your shed walls. For even more protection, install guttering with downpipes to manage runoff.
Shed doors and windows
Check for cracks around windows and doors, and seal any gaps with silicone or caulk to block rain and draughts.
4. Protect your shed against shed condensation
Condensation occurs when warm, moist air hits cooler surfaces like shed walls or tools, leaving water droplets behind. This is known as the ‘dew point’. To prevent condensation damp, focus on improving ventilation, insulation and heating.
Shed ventilation

Ventilation is essential. For smaller sheds, a couple of static vents installed on opposite walls are usually sufficient to allow air to circulate. However, for larger sheds – anything over 12x8ft – it’s worth considering a solar or mains-powered vent to improve airflow. Make sure all vents are mesh-backed to prevent insects from finding their way inside.
A dehumidifier is another worthwhile investment for removing excess moisture. Even something as simple as opening your shed doors and windows every few days helps replace moist air with fresh air. Our guide to ventilating your shed has more helpful ideas.
Heating
Adding a gentle heat source, such as a tubular heater, keeps the temperature above the dew point. If your shed doesn’t have a 240V electricity supply, there are still effective heating options available.
A professionally installed wood burner, paired with a carbon monoxide detector for safety, is one option. Alternatively, a solar-powered air heater can provide a steady source of warmth.
Avoid paraffin or Calor Gas heaters, however, as they release moisture into the air, which will only add to your damp issues.
Shed insulation

Insulating your shed also makes a big difference. Without insulation, cool surfaces inside your shed – like windows, metal tools or walls – can collect moisture when the temperature drops. Over time, this can cause soft furnishings, wood and paper to grow damp, swell and even develop mould. Even if your shed isn’t heated, installing insulation can help trap any available warmth inside. This stabilises the internal temperature, reducing the risk of condensation and keeping your shed environment much drier.
Line the walls with silver-backed bubble wrap for basic protection, or use solid foam boards like Kingspan or Celotex for a more effective solution. Insulation with a closed-cell foam structure and reflective foil surface raises internal surface temperatures, reducing condensation and improving energy efficiency.
Insulating the floor will also help prevent cold spots where condensation can form. To insulate your shed floor effectively, use rigid foam boards like PIR insulation, which offer excellent moisture resistance and stability. Measure and cut the boards to fit snugly between the floor joists, then secure them in place and seal any gaps with expanding foam or caulk.
If removing the floor isn’t an option, you can create a false floor by laying a breathable membrane, placing the insulation on top, and covering it with plywood or OSB boards. This helps prevent damp, regulate temperature and improve energy efficiency.
Read more on insulating your shed in our dedicated guide.
5. Protect tools from damp with clever storage
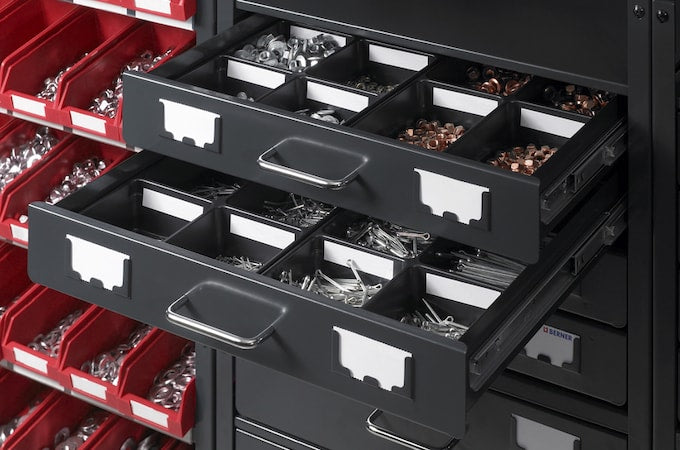
Even after properly damp-proofing your shed, your tools and equipment need careful storage to stay in good condition. Use sealed boxes, cupboards or drawers to keep items dry, and add silica gel sachets to absorb any lingering moisture.
Make it a habit to clean and store your tools after use. Leaving them lying around can lead to unnecessary rust and corrosion, even in a damp-proofed shed.
6. Keep damp at bay with regular shed maintenance checks
Maintaining your shed regularly is a must for keeping damp at bay. To make it easier, follow this seasonal checklist:
- Spring: Check for damage caused by winter weather, like cracked paint or warped wood, and reapply treatments as needed.
- Summer: Inspect the roof and seal any gaps before wetter weather arrives.
- Autumn: Clear debris from gutters and downpipes to prevent blockages during heavy rain.
- Winter: Ensure snow doesn’t build up on the roof and keep an eye out for leaks or condensation inside.
Damp-proofing your shed keeps your belongings safe and your garden building in great condition. By identifying the type of damp you’re dealing with and applying the right fixes, your shed can stay dry and protected all year round.
MORE HELP
Visit the Waltons help pages or the Waltons garden building how-to guides for advice, tips, and all things sheddie.
